Collaborating
Last updated on 2024-09-29 | Edit this page
Overview
Questions
- How can I use version control to collaborate with other people?
Objectives
- Clone a remote repository.
- Collaborate by pushing to a common repository.
- Describe the basic collaborative workflow.
For the next step, get into pairs. One person will be the “Owner” and the other will be the “Collaborator”. The goal is that the Collaborator add changes into the Owner’s repository. We will switch roles at the end, so both persons will play Owner and Collaborator.
Practicing By Yourself
If you’re working through this lesson on your own, you can carry on by opening a second terminal window. This window will represent your partner, working on another computer. You won’t need to give anyone access on GitHub, because both ‘partners’ are you.
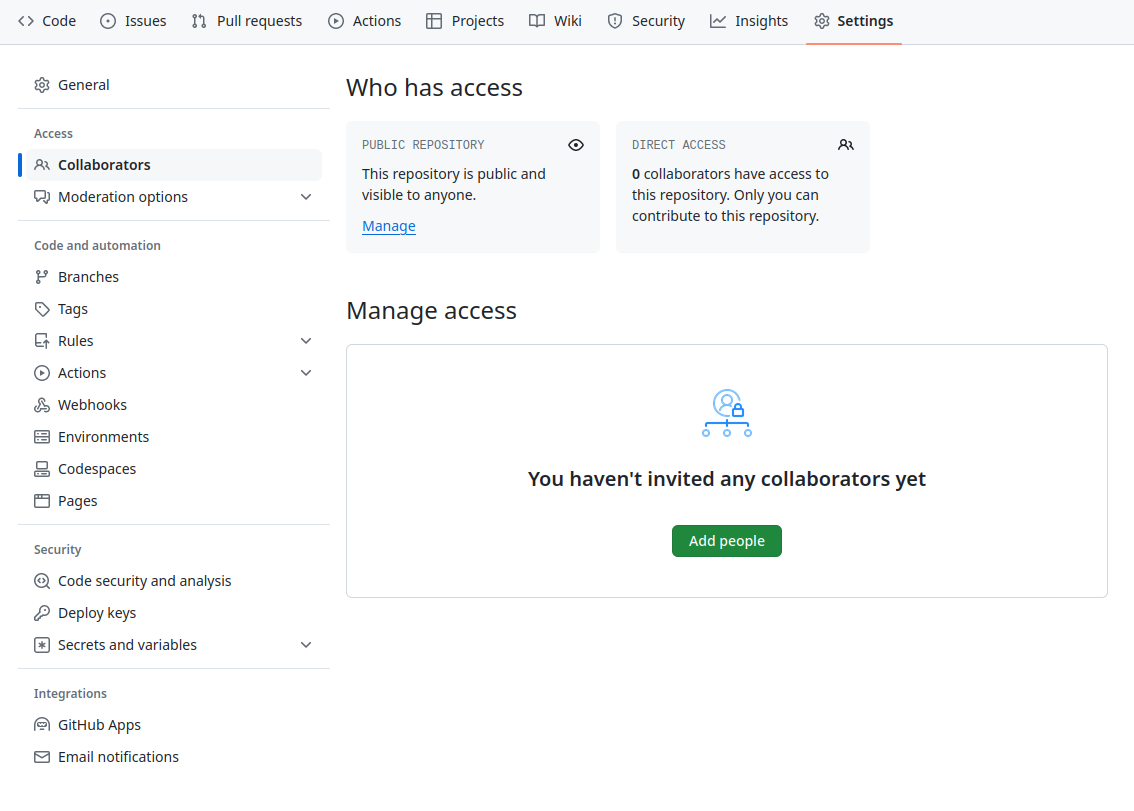
The Owner needs to give the Collaborator access. In your repository page on GitHub, click the “Settings” button on the right, select “Collaborators”, click “Add people”, and then enter your partner’s username.
To accept access to the Owner’s repo, the Collaborator needs to go to https://github.com/notifications or check for email notification. Once there she can accept access to the Owner’s repo.
Next, the Collaborator needs to download a copy of the Owner’s repository to her machine. This is called “cloning a repo”.
The Collaborator doesn’t want to overwrite her own version of
recipes.git, so needs to clone the Owner’s repository to a
different location than her own repository with the same name.
To clone the Owner’s repo into her Desktop folder, the
Collaborator enters:
Replace ‘alflin’ with the Owner’s username.
If you choose to clone without the clone path
(~/Desktop/alflin-recipes) specified at the end, you will
clone inside your own recipes folder! Make sure to navigate to the
Desktop folder first.

The Collaborator can now make a change in her clone of the Owner’s repository, exactly the same way as we’ve been doing before:
OUTPUT
# Hummus
## Ingredients
* chickpeas
* lemon
* olive oil
* saltOUTPUT
 1 file changed, 6 insertion(+)
 create mode 100644 hummus.md
Then push the change to the Owner’s repository on GitHub:
OUTPUT
Enumerating objects: 4, done.
Counting objects: 4, done.
Delta compression using up to 4 threads.
Compressing objects: 100% (2/2), done.
Writing objects: 100% (3/3), 306 bytes, done.
Total 3 (delta 0), reused 0 (delta 0)
To https://github.com/alflin/recipes.git
   9272da5..29aba7c  main -> main
Note that we didn’t have to create a remote called
origin: Git uses this name by default when we clone a
repository. (This is why origin was a sensible choice
earlier when we were setting up remotes by hand.)
Take a look at the Owner’s repository on GitHub again, and you should be able to see the new commit made by the Collaborator. You may need to refresh your browser to see the new commit.
Some more about remotes
In this episode and the previous one, our local repository has had a
single “remote”, called origin. A remote is a copy of the
repository that is hosted somewhere else, that we can push to and pull
from, and there’s no reason that you have to work with only one. For
example, on some large projects you might have your own copy in your own
GitHub account (you’d probably call this origin) and also
the main “upstream” project repository (let’s call this
upstream for the sake of examples). You would pull from
upstream from time to time to get the latest updates that
other people have committed.
Remember that the name you give to a remote only exists locally. It’s
an alias that you choose - whether origin, or
upstream, or alfred - and not something
intrinstic to the remote repository.
The git remote family of commands is used to set up and
alter the remotes associated with a repository. Here are some of the
most useful ones:
-
git remote -vlists all the remotes that are configured (we already used this in the last episode) -
git remote add [name] [url]is used to add a new remote -
git remote remove [name]removes a remote. Note that it doesn’t affect the remote repository at all - it just removes the link to it from the local repo. -
git remote set-url [name] [newurl]changes the URL that is associated with the remote. This is useful if it has moved, e.g. to a different GitHub account, or from GitHub to a different hosting service. Or, if we made a typo when adding it! -
git remote rename [oldname] [newname]changes the local alias by which a remote is known - its name. For example, one could use this to changeupstreamtoalfred.
To download the Collaborator’s changes from GitHub, the Owner now enters:
OUTPUT
remote: Enumerating objects: 4, done.
remote: Counting objects: 100% (4/4), done.
remote: Compressing objects: 100% (2/2), done.
remote: Total 3 (delta 0), reused 3 (delta 0), pack-reused 0
Unpacking objects: 100% (3/3), done.
From https://github.com/alflin/recipes
 * branch            main     -> FETCH_HEAD
   9272da5..29aba7c  main     -> origin/main
Updating 9272da5..29aba7c
Fast-forward
 hummus.md | 5 +
 1 file changed, 5 insertion(+)
 create mode 100644 hummus.md
Now the three repositories (Owner’s local, Collaborator’s local, and Owner’s on GitHub) are back in sync.
A Basic Collaborative Workflow
In practice, it is good to be sure that you have an updated version
of the repository you are collaborating on, so you should
git pull before making our changes. The basic collaborative
workflow would be:
- update your local repo with
git pull origin main, - make your changes and stage them with
git add, - commit your changes with
git commit -m, and - upload the changes to GitHub with
git push origin main
It is better to make many commits with smaller changes rather than of one commit with massive changes: small commits are easier to read and review.
Switch Roles and Repeat
Switch roles and repeat the whole process.
Review Changes
The Owner pushed commits to the repository without giving any information to the Collaborator. How can the Collaborator find out what has changed with command line? And on GitHub?
On the command line, the Collaborator can use
git fetch origin main to get the remote changes into the
local repository, but without merging them. Then by running
git diff main origin/main the Collaborator will see the
changes output in the terminal.
On GitHub, the Collaborator can go to the repository and click on “commits” to view the most recent commits pushed to the repository.
Version History, Backup, and Version Control
Some backup software can keep a history of the versions of your files. They also allows you to recover specific versions. How is this functionality different from version control? What are some of the benefits of using version control, Git and GitHub?
-
git clonecopies a remote repository to create a local repository with a remote calledoriginautomatically set up.
Comment Changes in GitHub
The Collaborator has some questions about one line change made by the Owner and has some suggestions to propose.
With GitHub, it is possible to comment on the diff of a commit. Over the line of code to comment, a blue comment icon appears to open a comment window.
The Collaborator posts her comments and suggestions using the GitHub interface.