Project Management With RStudio
Last updated on 2026-06-19 | Edit this page
Overview
Questions
- How can I manage my projects in R?
Objectives
- Create self-contained projects in RStudio
Introduction
The scientific process is naturally incremental, and many projects start life as random notes, some code, then a manuscript, and eventually everything is a bit mixed together.
Managing your projects in a reproducible fashion doesn’t just make your science reproducible, it makes your life easier.
— Vince Buffalo (@vsbuffalo) April 15, 2013
Most people tend to organize their projects like this:
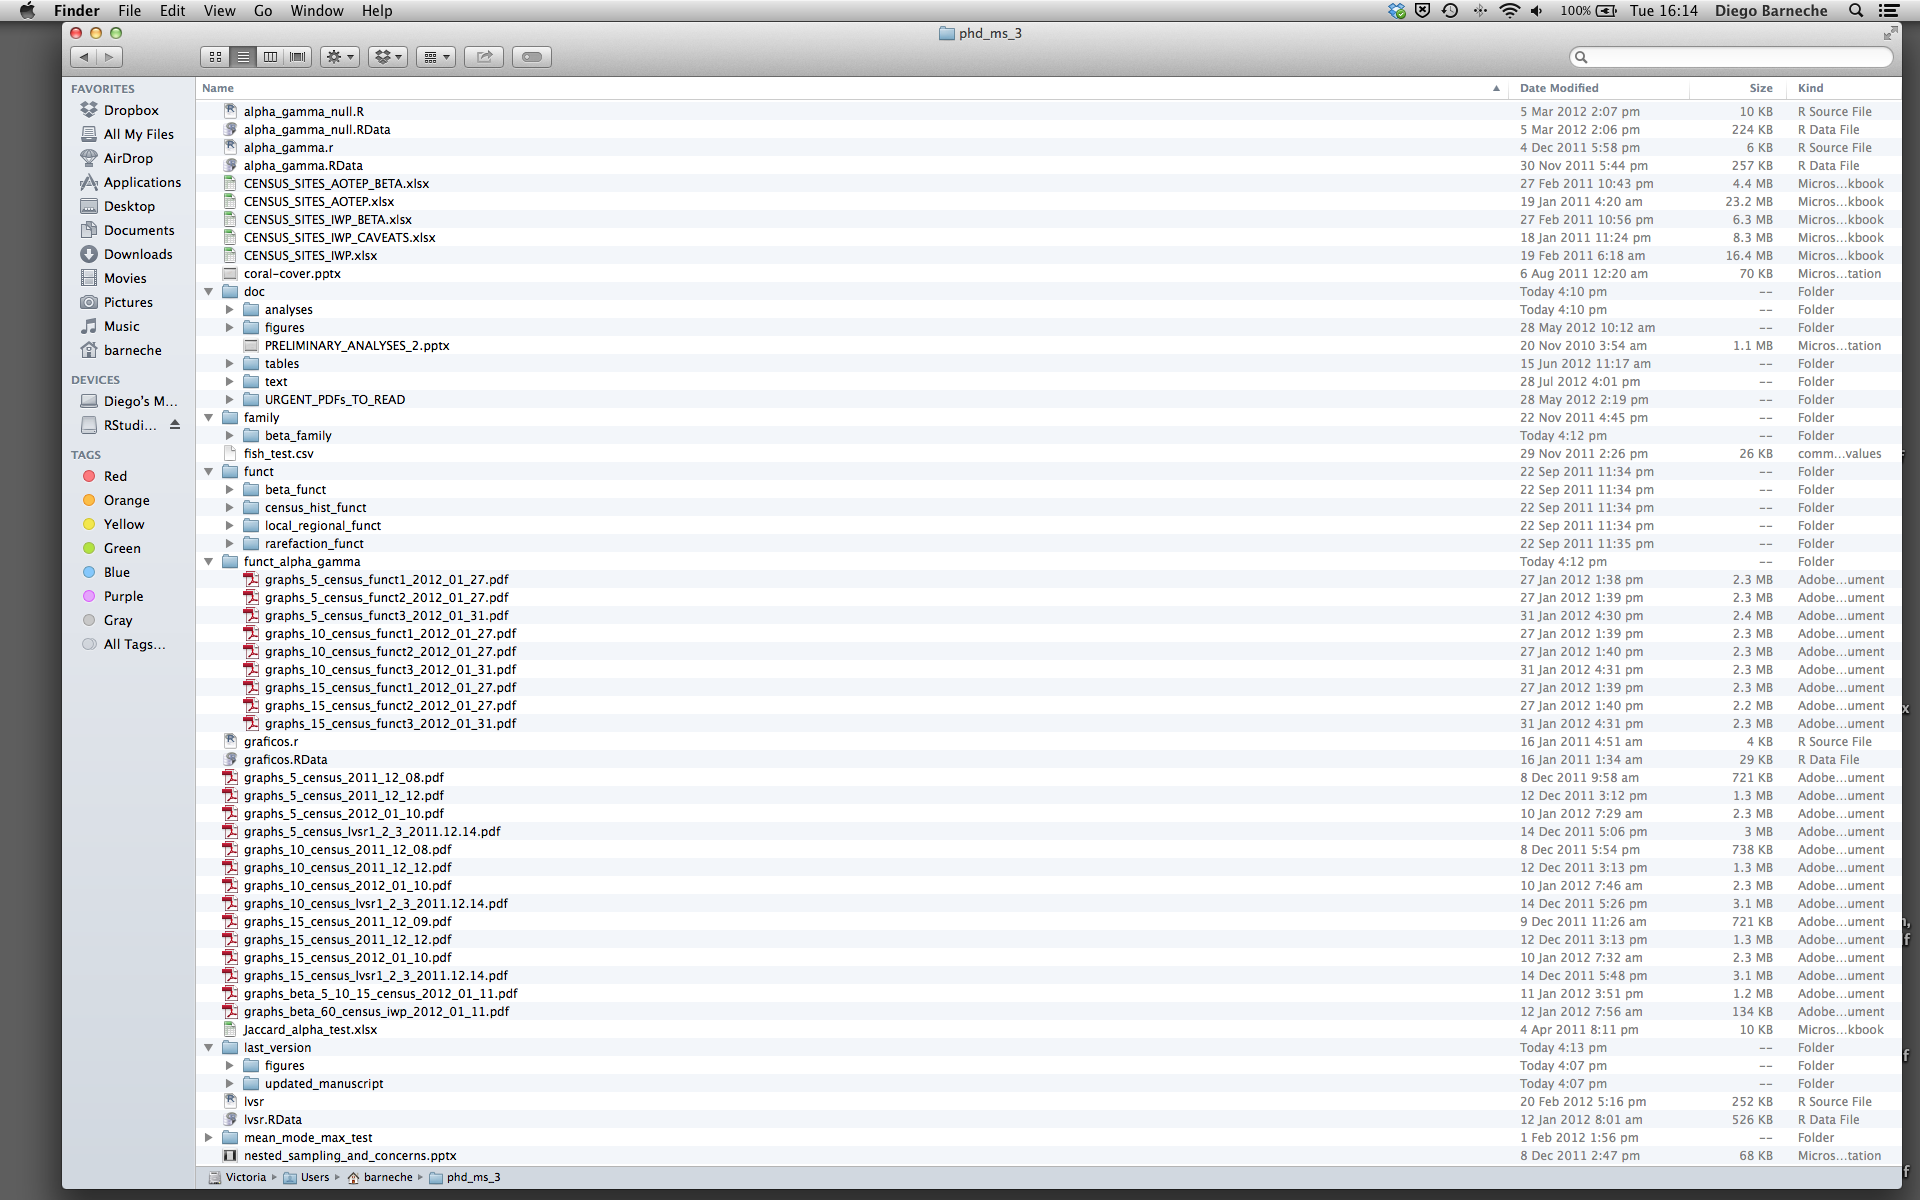
There are many reasons why we should ALWAYS avoid this:
- It is really hard to tell which version of your data is the original and which is the modified;
- It gets really messy because it mixes files with various extensions together;
- It probably takes you a lot of time to actually find things, and relate the correct figures to the exact code that has been used to generate it;
A good project layout will ultimately make your life easier:
- It will help ensure the integrity of your data;
- It makes it simpler to share your code with someone else (a lab-mate, collaborator, or supervisor);
- It allows you to easily upload your code with your manuscript submission;
- It makes it easier to pick the project back up after a break.
A possible solution
Fortunately, there are tools and packages which can help you manage your work effectively.
One of the most powerful and useful aspects of RStudio is its project management functionality. We’ll be using this today to create a self-contained, reproducible project.
Challenge 1: Creating a self-contained project
We’re going to create a new project in RStudio:
- Click the “File” menu button, then “New Project”.
- Click “New Directory”.
- Click “New Project”.
- Type in the name of the directory to store your project, e.g. “my_project”.
- If available, select the checkbox for “Create a git repository.”
- Click the “Create Project” button.
The simplest way to open an RStudio project once it has been created
is to click through your file system to get to the directory where it
was saved and double click on the .Rproj file. This will
open RStudio and start your R session in the same directory as the
.Rproj file. All your data, plots and scripts will now be
relative to the project directory. RStudio projects have the added
benefit of allowing you to open multiple projects at the same time each
open to its own project directory. This allows you to keep multiple
projects open without them interfering with each other.
Challenge 2: Opening an RStudio project through the file system
- Exit RStudio.
- Navigate to the directory where you created a project in Challenge 1.
- Double click on the
.Rprojfile in that directory.
Best practices for project organization
Although there is no “best” way to lay out a project, there are some general principles to adhere to that will make project management easier:
Treat data as read only
This is probably the most important goal of setting up a project. Data is typically time consuming and/or expensive to collect. Working with them interactively (e.g., in Excel) where they can be modified means you are never sure of where the data came from, or how it has been modified since collection. It is therefore a good idea to treat your data as “read-only”.
Data Cleaning
In many cases your data will be “dirty”: it will need significant preprocessing to get into a format R (or any other programming language) will find useful. This task is sometimes called “data munging”. Storing these scripts in a separate folder, and creating a second “read-only” data folder to hold the “cleaned” data sets can prevent confusion between the two sets.
Treat generated output as disposable
Anything generated by your scripts should be treated as disposable: it should all be able to be regenerated from your scripts.
There are lots of different ways to manage this output. Having an output folder with different sub-directories for each separate analysis makes it easier later. Since many analyses are exploratory and don’t end up being used in the final project, and some of the analyses get shared between projects.
Tip: Good Enough Practices for Scientific Computing
Good Enough Practices for Scientific Computing gives the following recommendations for project organization:
- Put each project in its own directory, which is named after the project.
- Put text documents associated with the project in the
docdirectory. - Put raw data and metadata in the
datadirectory, and files generated during cleanup and analysis in aresultsdirectory. - Put source for the project’s scripts and programs in the
srcdirectory, and programs brought in from elsewhere or compiled locally in thebindirectory. - Name all files to reflect their content or function.
Separate function definition and application
One of the more effective ways to work with R is to start by writing the code you want to run directly in a .R script, and then running the selected lines (either using the keyboard shortcuts in RStudio or clicking the “Run” button) in the interactive R console.
When your project is in its early stages, the initial .R script file usually contains many lines of directly executed code. As it matures, reusable chunks get pulled into their own functions. It’s a good idea to separate these functions into two separate folders; one to store useful functions that you’ll reuse across analyses and projects, and one to store the analysis scripts.
Save the data in the data directory
Now we have a good directory structure we will now place/save the
data file in the data/ directory.
Challenge 3
Download the gapminder data from this link to a csv file.
- Download the file (right mouse click on the link above -> “Save link as” / “Save file as”, or click on the link and after the page loads, press Ctrl+S or choose File -> “Save page as”)
- Make sure it’s saved under the name
gapminder_data.csv - Save the file in the
data/folder within your project.
We will load and inspect these data later.
Challenge 4
It is useful to get some general idea about the dataset, directly from the command line, before loading it into R. Understanding the dataset better will come in handy when making decisions on how to load it in R. Use the command-line shell to answer the following questions:
- What is the size of the file?
- How many rows of data does it contain?
- What kinds of values are stored in this file?
By running these commands in the shell:
OUTPUT
-rw-r--r-- 1 root root 80K Jun 19 15:21 data/gapminder_data.csvThe file size is 80K.
OUTPUT
1705 data/gapminder_data.csvThere are 1705 lines. The data looks like:
OUTPUT
country,year,pop,continent,lifeExp,gdpPercap
Afghanistan,1952,8425333,Asia,28.801,779.4453145
Afghanistan,1957,9240934,Asia,30.332,820.8530296
Afghanistan,1962,10267083,Asia,31.997,853.10071
Afghanistan,1967,11537966,Asia,34.02,836.1971382
Afghanistan,1972,13079460,Asia,36.088,739.9811058
Afghanistan,1977,14880372,Asia,38.438,786.11336
Afghanistan,1982,12881816,Asia,39.854,978.0114388
Afghanistan,1987,13867957,Asia,40.822,852.3959448
Afghanistan,1992,16317921,Asia,41.674,649.3413952Tip: command line in RStudio
The Terminal tab in the console pane provides a convenient place directly within RStudio to interact directly with the command line.
Working directory
Knowing R’s current working directory is important because when you need to access other files (for example, to import a data file), R will look for them relative to the current working directory.
Each time you create a new RStudio Project, it will create a new
directory for that project. When you open an existing
.Rproj file, it will open that project and set R’s working
directory to the folder that file is in.
Challenge 5
You can check the current working directory with the
getwd() command, or by using the menus in RStudio.
- In the console, type
getwd()(“wd” is short for “working directory”) and hit Enter. - In the Files pane, double click on the
datafolder to open it (or navigate to any other folder you wish). To get the Files pane back to the current working directory, click “More” and then select “Go To Working Directory”.
You can change the working directory with setwd(), or by
using RStudio menus.
- In the console, type
setwd("data")and hit Enter. Typegetwd()and hit Enter to see the new working directory. - In the menus at the top of the RStudio window, click the “Session”
menu button, and then select “Set Working Directory” and then “Choose
Directory”. Next, in the windows navigator that opens, navigate back to
the project directory, and click “Open”. Note that a
setwdcommand will automatically appear in the console.
Tip: File does not exist errors
When you’re attempting to reference a file in your R code and you’re getting errors saying the file doesn’t exist, it’s a good idea to check your working directory. You need to either provide an absolute path to the file, or you need to make sure the file is saved in the working directory (or a subfolder of the working directory) and provide a relative path.
Version Control
It is important to use version control with projects. Go here for a good lesson which describes using Git with RStudio.
- Use RStudio to create and manage projects with consistent layout.
- Treat raw data as read-only.
- Treat generated output as disposable.
- Separate function definition and application.